Fix Startup Kernel Panic Error on Mac
Summary: Learn how to fix startup kernel panic error on Mac. In case your Mac is inaccessible, create a recovery drive, and recover data by using the free-to-try data recovery software for Mac.

Table of Content
1. Run Apple Diagnostics2. Boot Your Mac into Safe Mode
3. Repair Startup Disk through Disk Utility
4. Reset NVRAM and PRAM
5. Uninstall Incompatible Applications
6. Delete Software Update Caches
7. Create Recovery Drive to Salvage Data
8. Reinstall macOS after Data Recovery
Occasionally, your Mac crashes and throws the startup kernel panic error due to some critical issues. And, you may not be able to access your Mac Desktop as usual. As a result, all the stored data present on your Mac turns inaccessible.
You need to fix the startup kernel panic error from your Mac to avoid losing your valuable data permanently. But before troubleshooting, you should know why the error occurs on your Mac.
Common Reasons for Kernel Panic Error
- Incompatible software
- Newly added or replaced hardware
- macOS update or upgrade
- Low-storage space on the startup disk
- Insufficient RAM to tackle multiple apps
- Low CPU power to handle processor-intensive apps
- Virus or malware
- Race condition due to several apps accessing system resources and storage drive at the same time
The various methods to fix kernel panic error and recover your inaccessible data on Mac are as follows.
1. Run Apple Diagnostics
Running Apple Diagnostics on your Mac can resolve the kernel panic error. Steps to fix your Mac through Apple Diagnostics are as follows:
a) Disconnect all peripherals and power on your Mac. Immediately press & hold the D key until the Apple Diagnostics screen appears.
b) Apple Diagnostics displays a progress bar while it verifies your Mac. Wait till the verification process completes.
c) Apple Diagnostics suggests solutions and shows reference code if it finds any problem. Choose from the various options, then restart or shut down your Mac.
2. Boot Your Mac into Safe Mode
Try booting your Mac into Safe Mode to fix kernel panic error. Steps are as follows:
a) Power on your Mac, then immediately press and hold the Shift key. Release the key when you see the Apple logo. Your Mac will boot into Safe Mode.
b) macOS fixes issues that cause kernel panic error in the Safe Mode. If your Mac starts up in Safe Mode, restart your Mac, then let it boot normally.
c) When your Mac doesn’t boot into Safe Mode, then the startup disk space is less. Remove unneeded apps, junks, and large files from the startup disk to free up its space.
3. Repair Startup Disk through Disk Utility
Repairing the startup disk can fix the kernel panic error. For that, you need to use First Aid of Disk Utility in macOS Recovery mode. Steps to repair your startup disk are as follows:
a) Power on your Mac, then press and hold the Command + R keys. Release them when the Apple logo appears. Mac will boot into macOS Recovery mode.
b) In the macOS Utilities window, select Disk Utility and then click Continue. From the sidebar, select Macintosh HD the startup Disk, then click the First Aid tab from the top.
c) Click Run to initiate the startup disk repair process. When the repair is successful, you won’t find the kernel panic issue.
4. Reset NVRAM and PRAM
Resetting the NVRAM and PRAM can fix the kernel panic problem. Steps to reset NVRAM and PRAM on your Mac are as follows:
a) Power on your Mac, then press and hold Command + Option + P + R keys.
b) Release the keys your Mac starts up twice or when you hear the second chime.
The above steps set the NVRAM and PRAM to its default value. And, hopefully, your Mac won’t throw the kernel panic error.
5. Uninstall Incompatible Apps
Try uninstalling the recently installed third-party applications from your Mac to fix the kernel panic error. Steps to uninstall an app are explained next:
a) Go to Finder > Applications. Look for the recent application that may be causing the kernel panic error.
b) Drag and drop the application to Trash to uninstall it from your Mac.
Hopefully, you won’t get the kernel panic error. In case the issue remains, uninstall the next recent app.
6. Delete Software Update Caches
You should clean the following files in case your Mac crashed during the software update.
- /Library/Preferences/com.apple.SoftwareUpdate.plist
- /Home/Library/Caches/com.apple.SoftwareUpdate/
- /Home/Library/Preferences/ByHost/com.apple.SoftwareUpdate.123.plist
7. Create Recovery Drive to Salvage Data
Note: Create Recovery Drive feature is only available in Stellar Data Recovery Version 10 & earlier! The latest version has eliminated the need of any other Mac or external device. User can directly use Stellar Data Recovery through an activated link.
When your Mac doesn’t boot to Desktop due to kernel panic error, perform the following:
a) Download and install Stellar Data Recovery Professional for Mac on a working Mac.
b) Launch the software and use it to create a recovery drive on a USB flash device.
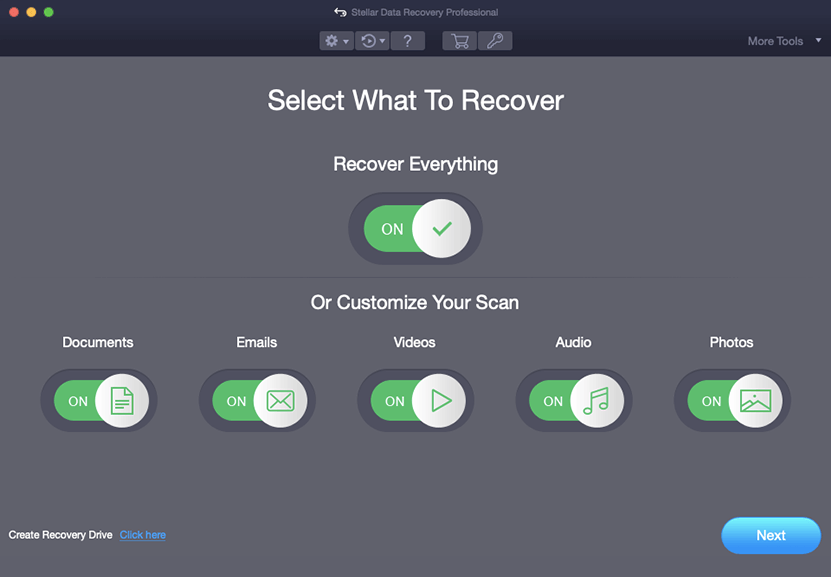
c) Connect the recovery drive to the affected Mac to salvage data from it.
Watch Video: How to recover data from a non-booting Mac?
8. Reinstall macOS after Data Recovery
After performing the Mac data recovery task, erase your Mac storage drive and reinstall macOS to fix the kernel panic issue completely. Steps are as follows:
a) Power on your Mac, then press and hold Command + R keys. Release them when you see the Apple logo. Your Mac will boot into macOS Recovery mode.
b) In the macOS Utilities window, click Reinstall macOS, and then Continue.
c) Do as per the instructions shown on the screen, choose the startup disk, and click Install. When the installation process is through, you won’t find any kernel panic error.
Conclusion
Fixing startup kernel panic error on Mac is easy if you know the different troubleshooting methods. But back up your Mac before you perform any critical steps. In case your Mac doesn’t start up due to the error, and you can’t back up, then leverage Stellar Data Recovery Professional for Mac to create a recovery drive, and use the bootable drive to salvage data from the unbootable Mac. Once data recovery is over, reinstall macOS to fix the kernel panic issue completely.
About The Author
Vishal
Your friendly neighbourhood data recovery expert for macOS. Further, you can check out the available Stellar Data Recovery for Mac options by yourself.


