How to Get Deleted Screenshots Back on Mac For Free?
Summary: In this blog, we will try different methods to restore your screenshots to your device. You can also download a data recovery software like Stellar Data Recovery Free Edition for Mac to recover your lost screenshots.

Taking screenshots while browsing the web is a way of bookmarking stuff you may want to buy later or using those images for reference, inspiration, etc. Over time, screenshots have become an essential part of our digital library.
However, like any other data, you may lose the screenshots due to accidental deletion, file corruption, or virus attack. Some key reasons can be:
1) Human error: Accidental deletion or formatting is the most prominent reason for data loss.
2) Virus/Malware attacks: Virus/Malware can infect your Mac and wipe your data, including screenshots.
3) OS crash: Mac OS is one of the most efficient OS around, but it is still prone to crashes. Sometimes these crashes could lead to data loss.
4) Hardware failure: A hardware failure on your Mac could render your device inaccessible, and therefore, you won’t be able to access your data.
Fortunately, there are plenty of ways you can recover your lost screenshots. It starts by looking at familiar places such as Trash folders, backup files, etc. If you are unable to find your screenshots anywhere, you can go for a data recovery software.
Let us explore them one-by-one.
1. Look in Trash Folder
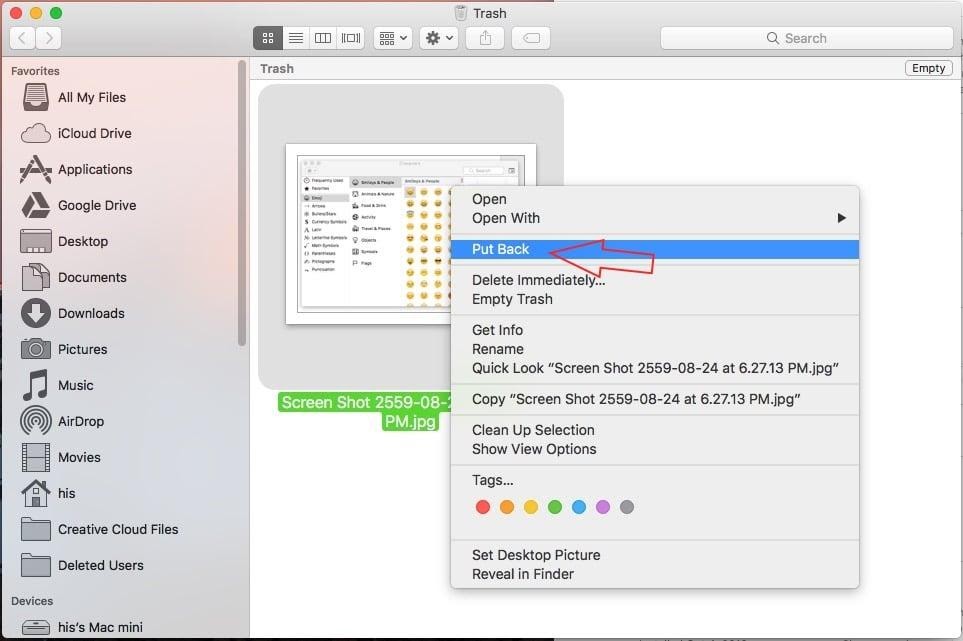
Often, we delete the files, which sends them to the Trash folder. If we do not empty the Trash folder right away, we can easily recover the data from Trash.
Trash is usually located towards the end of your dock. Right-click on the Trash icon and click Open. A list of deleted files would be displayed. You can look for the deleted screenshots and restore them to your Mac’s hard drive. Just select the desired file and then click Put Back.

2. Search for backup
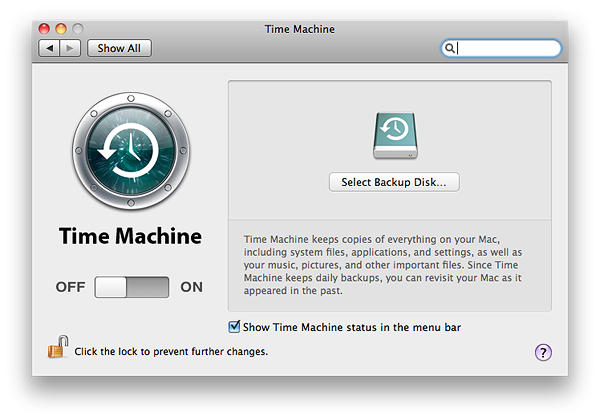
It is always good to check for any backup of your lost/deleted files. Mac has a built-in Time Machine feature that allows you to regularly backup your data on an external USB device or to an AirPort Time Capsule. Time Machine automatically backs up the data in your drive over several points of time. You can then restore your Mac to a specific time.
Read this Apple support article to see the detailed steps.
A screenshot backup, done on a cloud service such as Apple’s iCloud, Zoho, Dropbox, etc. can also be retrieved quickly on any device. You need to sign-in to your Cloud account to access the data.

3. Use Data Recovery: Stellar Data Recovery Free Edition for Mac
In situations where no backup has been done, a good option is to use a professional, free Mac data recovery software. A data recovery software is designed to scan the device to look for lost/deleted data and restore them to your device.
A recommended product is Stellar Data Recovery Free Edition for Mac. It is an easy-to-use software that can recover up to 1GB of lost data on your Mac, free of cost.
Your screenshots are saved as images. You can, therefore, run the software and search for images. The software will scan the device to look for lost/deleted images that you can recover.
Please watch the video below to see the process in detail:
Note: If you wish to recover more than 1GB of data, you can go for the paid variants of the software that offer additional features as well. Click here to see a quick comparison table.
Pro Tips for keeping your screenshots safe
1. Regularly backup your data in Time Machine or External Drive.
2. Keep your Mac updated to avoid software crashes.
3. Regularly scan your device with credible antivirus.
Conclusion
This blog illustrates the different ways by which you can retrieve the screenshots back to your system. You can opt for a data recovery software option if you cannot get your data through any other method. A free data recovery software like Stellar Data Recovery Free Edition for Mac is an efficient way to restore your lost/deleted screenshots. The tool can recover up to 1 GB of data free of cost. If your requirements are more, you can opt for a paid version of the software.


