SSD Not Readable by Mac? Get It Fixed.
Summary: Learn how to fix a non-readable SSD on your Mac without needing to send it to a costly service center. The troubleshooting procedures mentioned here are entirely DIY. You need your Mac and, the troubled SSD, and sound knowledge of your native tools. Also, download this free SSD recovery tool on your MacBook, iMac, or Mac mini.

Solid-State Drive (SSD) is a robust storage technology that is fast and is less prone to data loss, unlike an electromechanical hard drive. But sometimes, when you connect an external SSD on your Mac, the storage medium won’t show up on your Desktop or Finder. Even prompt you with the error – The disk you inserted was not readable by this computer.
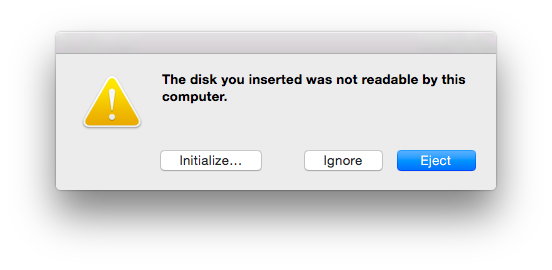
In case the SSD is new, empty, and plugged for the first time, you can click the Initialize button. Else, click the Ignore or Eject button, as initializing the SSD will erase the drive and create a new file system format. Also, you’ll lose all the stored data on the SSD.
So, what’s the reason for the unreadability of an SSD, you might question. Here is the list of common reasons that make your SSD unreadable on Mac:
- SSD is new and uninitialized for Mac
- SSD has the corrupt file system
- SSD has bad blocks due to failed storage cells
- SSD file system format is not compatible with Mac
- SSD is encoded with a non-compatible encryption algorithm
Employ the following DIY troubleshooting methods to fix the SSD unreadability issue on macOS.
1. General Troubleshooting Procedures
When your external SSD is not visible in Desktop, Finder, or Disk Utility when connected to your Mac, perform the following general troubleshooting procedures:
a) Check USB Connection: Reconnect the SSD to the USB port then restart your Mac. Or use a different USB cable to connect it to your Mac. You can even connect the SSD to a different USB port or use a different Mac or PC.
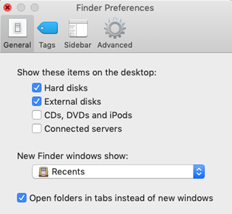
b) Enable SSD visibility on Desktop: In your Mac, go to Finder > Preferences > General. Check the ‘Hard disks’ and ‘External disks’ checkboxes under ‘Show these items on the desktop.’
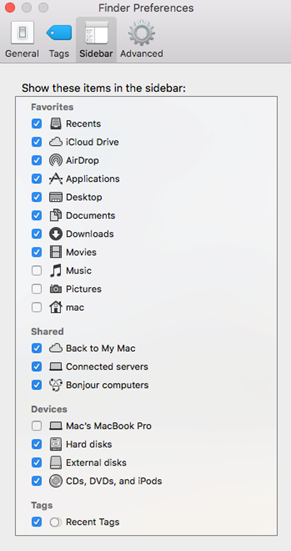
c) Enable SSD visibility on Sidebar of Finder: Go to Finder > Preferences > Sidebar. Check the ‘Hard disks’ and ‘External disks’ checkboxes under ‘Show these items on the sidebar.’
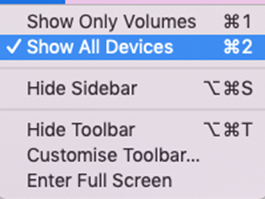
d) Enable SSD visibility from Disk Utility: Go to Finder > Applications > Utilities > Disk Utility. Click the View icon from the top-left corner, then select Show All Devices.
2. Repair SSD by Using Disk Utility
When your external SSD’s file system is corrupt or has bad blocks, you can repair the issue by using First Aid of Disk Utility. Steps are as follows:
a) Open the Disk Utility app. For that, go to Finder > Application > Utilities > Disk Utility.
b) From the Sidebar, select the external SSD, then click the First Aid tab from the top.
c) Click Run to initiate the repair process. If the repair is successful, you can access your SSD. Else, recover data from the SSD, and erase the drive to fix the SSD unreadability issue.
3. Recover SSD Data Using a Mac Data Recovery Software
In case Disk Utility can’t repair your external SSD, you can use a Mac data recovery software to recover inaccessible data from the drive. Steps are as follows:
a) Download and install the *trial version of Stellar Data Recovery Free Edition for Mac software on your MacBook, iMac, or Mac mini.
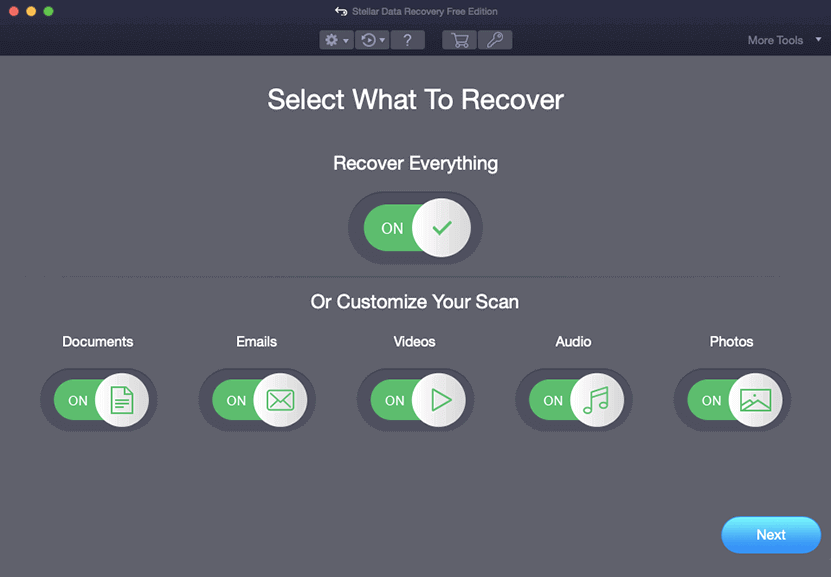
b) Launch the software, select the type of data present on the SSD, and then click Next. Select the SSD location and click Scan.
c) Preview any scanned files, select the required ones, and click Recover. Click Browse to specify a different drive location, then click Save.

*The free version of Stellar Data Recovery Free Edition for Mac software permits free recovery of files up to 1 GB. But the Stellar Data Recovery Professional for Mac edition can recover unlimited data from a corrupt SSD.
4. Erase the External SSD to Fix the Unreadability Problem
Once you’ve recovered data from the external SSD, you can erase it with the APFS format using Disk Utility. Steps to erase external SSD are as follows:
a) Open Disk Utility from the sidebar, select the external SSD, and then click Erase.
b) Specify the scheme, format, and name of the formatted SSD. Click Erase, and then Done.
After the SSD is formatted, it will function without any problem. Now, restore the recovered data to the SSD to make it just like before.
When the SSD has physical damage, it won’t be visible in Disk Utility or System Information. If data is essential, you can consult a data recovery service. Else, replace the SSD with a new one.
Conclusion
Fix the unreadability problem of your external SSD by checking the USB connection, setting the visibility preferences for Desktop and Finder, and repairing the drive using First Aid. If such troubleshooting procedures didn’t help, recover data from the external SSD using Stellar Data Recovery Free Edition for Mac software.
Once you recover the SSD’s inaccessible data, erase the drive using Disk Utility, and restore the recovered files. In case the SSD has physical damage, replace it with a new one. You can take help from a data recovery service provider to recover data from a physically damaged SSD.
About The Author
Vishal
Your friendly neighbourhood data recovery expert for macOS. Further, you can check out the available Stellar Data Recovery for Mac options by yourself.


