Recover USB Files Accidentally Formatted with Disk Utility
Summary: Facing trouble recovering lost data from a USB drive after formatting it unintentionally using Disk Utility on Mac? Learn how to recover lost data from a USB drive in this post.
Stellar Data Recovery Free Edition for Mac is an excellent application to recover files lost due to accidental formatting, deletion, or disk corruption. Start your free data recovery on Mac today!

We all have, at some point, accidentally formatted a USB drive only to discover later that it contained important data. Some users may have lost their precious files, such as family pictures and videos to such accidental formatting, while others may have had to bid adieu to important Word or Excel documents. Irrespective of what data is lost, the panic that comes after hitting ‘ERASE’ on your USB drive on Mac by mistake can be overwhelming.

But there’s always light at the end of the tunnel, and even after important files have been formatted with disk utility or terminal on Mac, it is possible to recover them.
You may think that recovering lost or corrupt files may be complicated, but the truth is that it’s quite easy with the help of special tools like free Mac data recovery software. So here are some pointers to help you recover your lost data on USB and format a USB drive the correct way.
How to Format a USB Drive Without Data Loss?
Formatting an external hard drive is the process of reverting it to its original partition and file system. It enables the drive to store data more efficiently while also ridding it of corrupted data and hidden Trojans.
It is essential to know that formatting a drive erases all the data on it. Thus, if you’re planning to format your USB, please take a backup of all the files into your Mac before doing so.
After a backup is taken, follow these steps to format your USB drive the right way.
- Plug the USB drive into your Mac. When it is successfully plugged in, the USB drive icon should show up on the screen automatically.
- Click on the Spotlight icon to the top-right corner to search for “Disk Utility”.
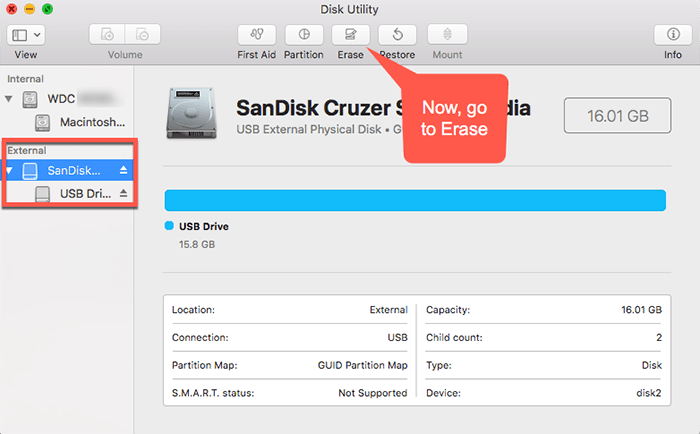
- Once you have opened Disk Utility, select your USB drive from the list to the left.

- Select “Erase” to format it.
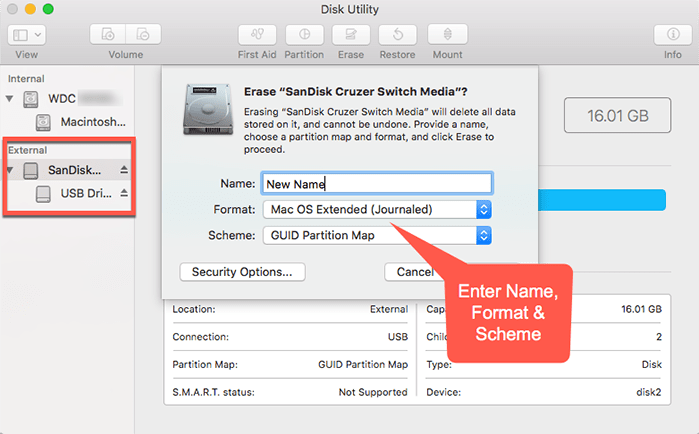
- Type in a new name for the USB and then select a file format (it is recommended that you leave the file format at default option, if you’re not aware of the different formats and what each one does).
- Click on Erase to format (Warning! This will erase ALL THE DATA from the drive. Only proceed if a backup is taken).
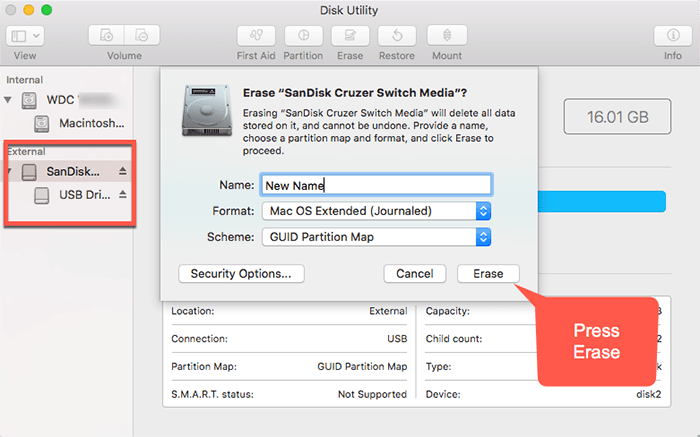
- The progress bar will move and when the format is completed, click on “Done.”
- Move the backup data from your Mac back into your USB drive.
This is how you can safely format your USB drive without any loss of data.
How to avoid accidental data loss when formatting USB?
If you have valuable data on your USB drive, take a complete backup using Time Machine application before formatting it. You could also use a cloud service, such as iCloud or Dropbox to take the backup.
Alternatively, you can also store the files on your USB in a folder on your Mac if it is a quick format, but the software and cloud services provide easy accessibility and safety.
Restoring Data [on Mac] from an Accidentally Formatted USB Drive
Data on any computer can be vulnerable to corruption and manipulation. Let’s say that you have lost pictures, videos, or documents from your USB drive due to an accidental format, virus attack, improper version updates, or system problems. You can use the below-mentioned tool and steps to restore your data.
Stellar Data Recovery Free Edition for Mac is a handy [& free] tool for file recovery of up to 1 GB in size. To recover files exceeding 1 GB, you need to upgrade to the Professional or the Premium edition. Stellar also has a 30-day money-back guarantee on all its products. The software is compatible with the latest macOS Ventura and earlier versions as well.
Follow these steps to recover formatted USB:
Note: If you lost your data due to a virus on your Mac, use an antivirus tool to scan and remove viruses and malware before proceeding further.
- Download Stellar Data Recovery Free Edition for Mac software from the website and install it to an internal drive on your Mac. To install the tool on your Mac:

- Unzip the StellarDataRecovery.dmg file. Then double-click the dmg file to mount a virtual volume – StellarDataRecovery.
- Drag the StellarDataRecovery application from the mounted virtual volume to the Applications folder.
- To launch the software, double-click on StellarDataRecovery in the Applications folder.
- Accept the License Agreement.The main window of Stellar Data Recovery software will be displayed.
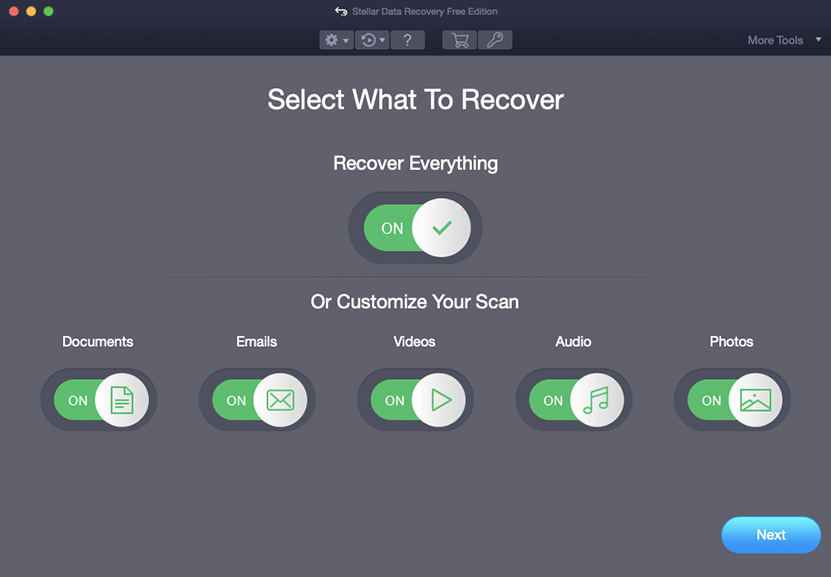
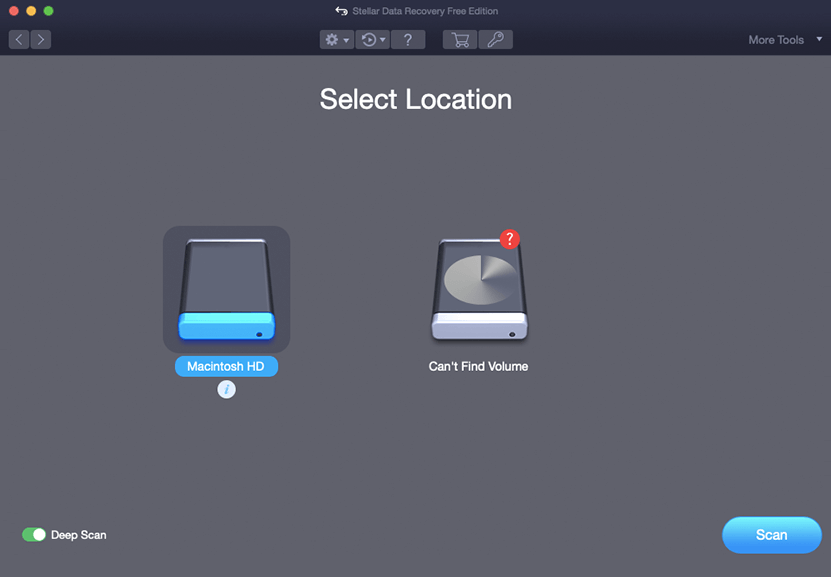
- After installation, launch the software. It offers an easy-to-use graphical user interface. Toggle the switches depending on the data to be recovered.
- Select the drive, in this case the USB drive that needs to be scanned for deleted files.
- The tool processes the recovery cycle and delivers the recovered files, which the user can then preview and Recover to their Mac.
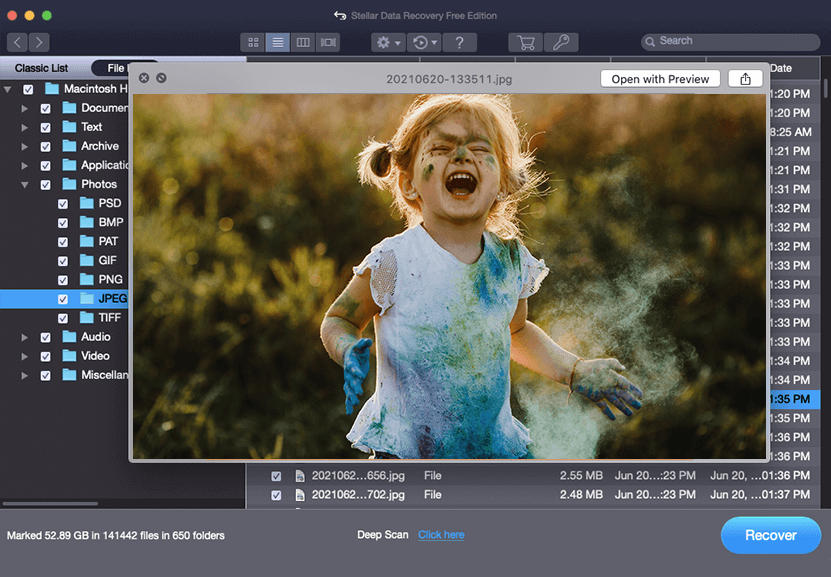
You can recover deleted files of almost all formats with the free version. The Premium version offers repair of corrupted and distorted videos/photos. You can also create a recovery drive in this version to boot and recover a crashed Mac system. Here, compare all the editions.
Conclusion
Now that you know how to recover lost data from your USB drive on Mac and how to format a USB drive properly, we hope you’ll be less prone to accidental data loss. Using a simple but highly efficient tool like Stellar Data Recovery Free Edition for Mac to recover lost data is extremely convenient and a life-saver in some cases. This tool is a trusted solution and is completely safe and easy to use.
About The Author
Vishal
Your friendly neighbourhood data recovery expert for macOS. Further, you can check out the available Stellar Data Recovery for Mac options by yourself.


