macOS Big Sur Drive Failing? Try These Fixes
Summary: Failing of your macOS Big Sur drive can result in permanent data loss. So, act before it’s too late to retrieve the data stored on the drive.
In this blog, you’ll learn how to fix the drive failing issue. In case of any data loss, recover the data using this free-to-try Mac data recovery software on macOS Big Sur 11 or earlier versions. 
Table of Content
1. Use First Aid of Disk Utility in macOS Recovery Mode2. Use Time Machine Backup to Restore Data in macOS Recovery Mode
3. Use a Mac Data Recovery Software to Recover Data in macOS Recovery Mode
Recent Mac uses solid-state drive instead of the erstwhile hard drive technology. But few iMac models take advantage of both the storage media to create a fusion drive. So, whatever storage drive you have on your Mac running on macOS Big Sur 11, the drive is bound to fail one day due to component damage, wear and tear of mechanical parts, and other reasons. The following symptoms are seen in case your drive begins to fail:
- Disk errors
- Mac runs slow
- macOS freezes
- Hard drive noise, etc.
If your macOS Big Sur drive is failing, try the fixes shared next to resolve the problem.
1. Use First Aid of Disk Utility in macOS Recovery Mode
Mac’s indispensable applications, Disk Utility, can help fix Mac storage drive errors and issues. To repair your storage drive, follow the steps mentioned below:
a) For Mac with Apple Silicon, start the Mac by pressing and holding the Power button until “Loading startup options” appears. Click Options, then click Continue.
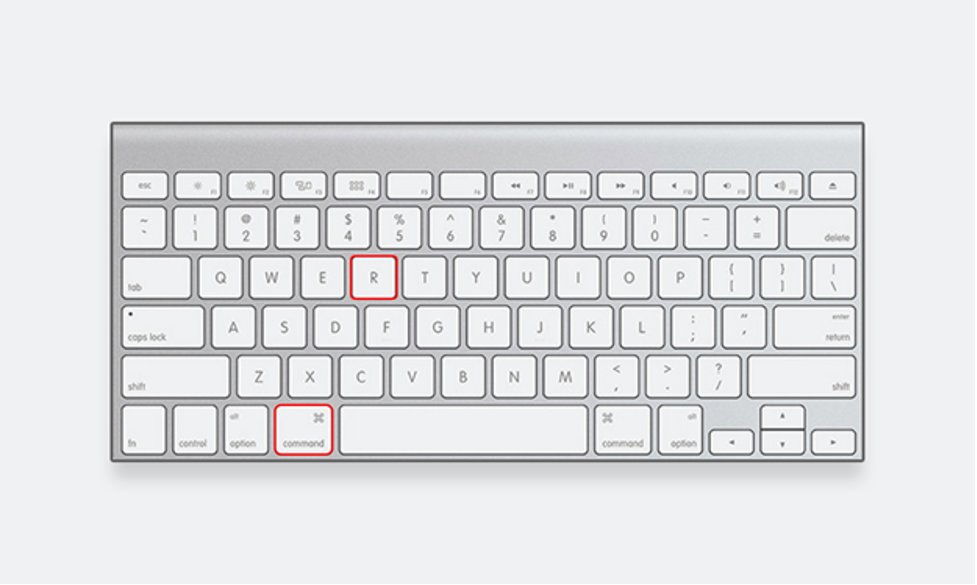
b) For Mac with Intel processor, start or restart the Mac, then immediately press and hold the Command + R keys until the startup screen appears.
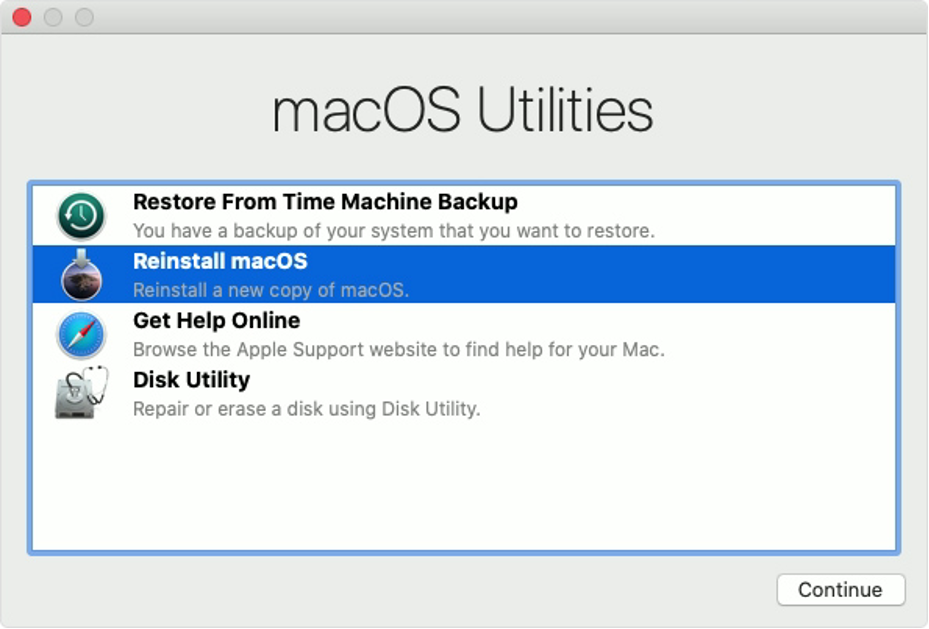
c) In macOS Recovery mode, go to macOS Utilities window, click Disk Utility, then click Continue. Disk Utility window will appear.
d) From the sidebar of Disk Utility, select Macintosh HD the startup disk, then click First Aid. Click Run to initiate the repair process. If the repair succeeds, access your data usually.
If the repair fails, back up the data stored on the Mac drive to an external storage device. Next, erase the drive using Disk Utility in macOS Recovery mode. Finally, reinstall macOS to fix all logical issues. In case the storage drive has physical damage, replace the drive with a new one.
2. Use Time Machine Backup to Restore Data in macOS Recovery Mode
When you have a Time Machine backup, restore all the backed up files in macOS Recovery Mode in Big Sur 11. The steps are as follows:
Warning: Restoring files require reinstallation of macOS. So, manually back up the newly created files from your Mac to an external drive to prevent losing them.
a) Ensure the Time Machine backup hard drive is connected to your Mac.
b) Boot your Mac into macOS Recovery mode; use an applicable method shared earlier.
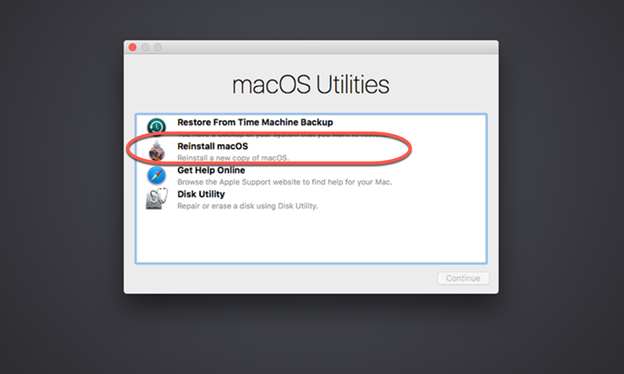
c) Click Reinstall macOS, then click Continue. Perform the on-screen directions to install the macOS stored on the recovery disk.
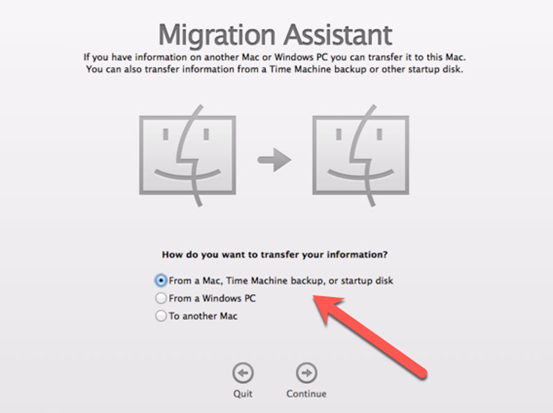
d) In Migration Assistant, select Transfer from a Time Machine Backup, then click Continue.
e) Select the restore date and time, then perform the on-screen directions to complete the restoration.
Congratulation! You have restored the lost files from Time Machine using the recovery mode.
3. Use a Mac Data Recovery Software to Recover Data in macOS Recovery Mode
When you don’t have a Time Machine backup, leverage a Mac data recovery software to recover the lost files on Mac—the steps are as follows:
a) Install and launch the *the free trial of Stellar Data Recovery Professional for Mac on your iMac, Mac mini, or MacBook. Activate the software to access the boot drive creation feature.
b) Create a bootable recovery drive using the software. Later, connect the boot drive to your failing Mac, power it on, and immediately press the Shift key. Next, select the USB boot drive.
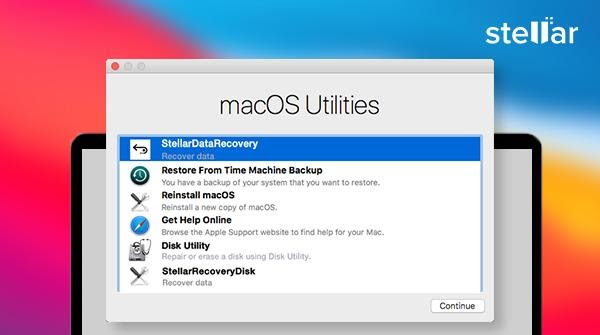
c) In recovery mode, select StellarDataRecovery from macOS Utilities, then click Continue.
B. See the next video to learn how to use the software to recover data on macOS Ventura or earlier.
*The free trial of Stellar Data Recovery Professional for Mac allows you to scan your Mac drive and preview your deleted files. To recover your files, you require to activate the tool. Also, the tool has a 30-day money-back guarantee; so, activate with confidence.
Conclusion
We hope the blog helped fix the macOS Big Sur 11 drive failing issue. Begin with repairing the drive by running First Aid of Disk Utility in macOS Recovery mode. If you’ve backup, restore the Mac using the backup. Else, use Stellar Data Recovery Professional for Mac to recover your lost files smoothly through your failing drive. Besides, the software works harmoniously with macOS Ventura 13 or earlier versions.
About The Author
Vishal
Your friendly neighbourhood data recovery expert for macOS. Further, you can check out the available Stellar Data Recovery for Mac options by yourself.


